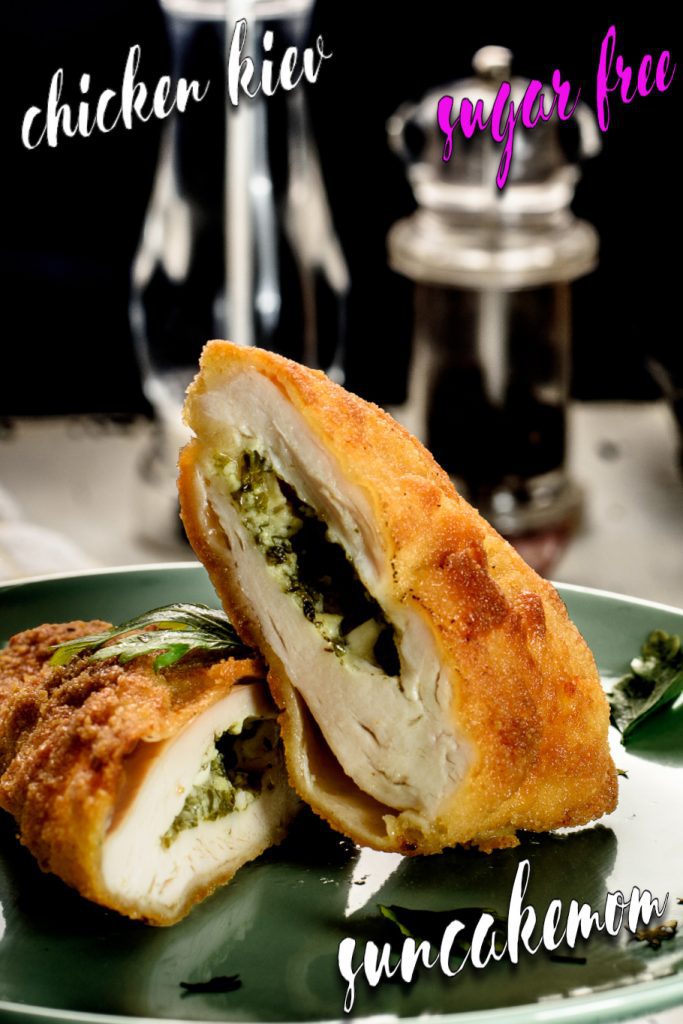
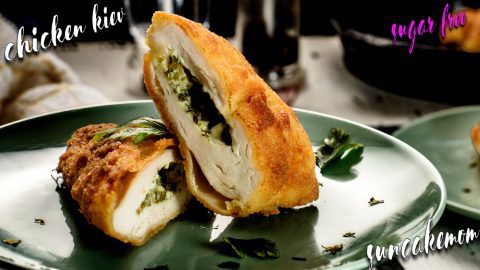
Rooting for something exclusive or just something from the flavorful past? Let’s try this Chicken Kiev recipe to enjoy a ride with the best!
If their personal marketing team is good then we see -in case of athletes- advertising sport clothing, body care products or healthy food. Other times though when money is better than the personal management team, our favorite faces pop up advertising things they most likely have no idea about, like cars, watches or the worst of all junk food.
Maybe junk food isn’t as bad as having an ideology that doesn’t match with the target audience’s or even worse, with the ruling class.
Luckily, nowadays we don’t get executed when speaking of our mind, not in the Western world anyway. Maybe the number of our followers dwindle a bit but virtual executions aren’t nearly as painful as real ones, although they certainly send a message across the board.
Nowadays, its enough to kick somebody out of a popular social media platform to lose their influence over the world but there were times when revolutions were needed with public executions at the end, to properly get the new era’s message across the collective conscience of the society.
Instead of virtual bubbles created by algorithms, people needed to build walls to keep focused on the desired ideology or at least keep all trade and social interactions under strict control.
Chicken Kiev’s origin is as hazy as the history of the Eastern Bloc and the countries growing out of its shatters.
Although various chicken dishes were developed since the 18th century, Russian chefs adopted the French haute cuisine and combined them with local culinary traditions and many other things happened that made tracing the modern chicken Kiev back to its roots an almost impossible endeavor.
When after the WWI Russia lost its emperor to the communists, with that, its bourgeois French haute cuisine had to go too. It didn’t mean that they forgot the dishes that were popular before but they had to rename them to be closer to the newly created proletarian class.
So, it came that instead of calling a dish “Côtelette de volaille” which is French for chicken cutlet, they started calling it in Russian “котлета де-воляй”. Something like we do it today with “sauté” and “stir-frying on high heat with small amount of oil” but with more state-imposed control.
This is how, according to official documents, Kiev style chicken should have become “Куриная котлета, фаршированная маслом“ which is “Chicken cutlet stuffed with butter”. Due to some miracles or by the decisions of higher powers, “Kiev style” was deemed to be safe for the average people to understand too or more importantly not to associate it with the bourgeois classes.
So, it came that Chicken Kiev survived the rigorous vetting of the ruling communist party and made it through the following years, fairly unscathed, reaching even US newspapers with its fame and glory.
Sure, getting into the news wasn’t as hard as escaping from the Eastern Bloc alive but many successfully managed and soon restaurants were popping up, offering a taste of home outside the confines of their new homes too.
From the papers to our tables the road was paved with countless cooking books featuring chicken Kiev and its varieties, like the ones promoting blue cheese instead of butter.
The original with butter, garlic and parsley couldn’t be triumphed by any of them yet, even though they tried their best, winning over a legend once doesn’t make any challenger instantly the best.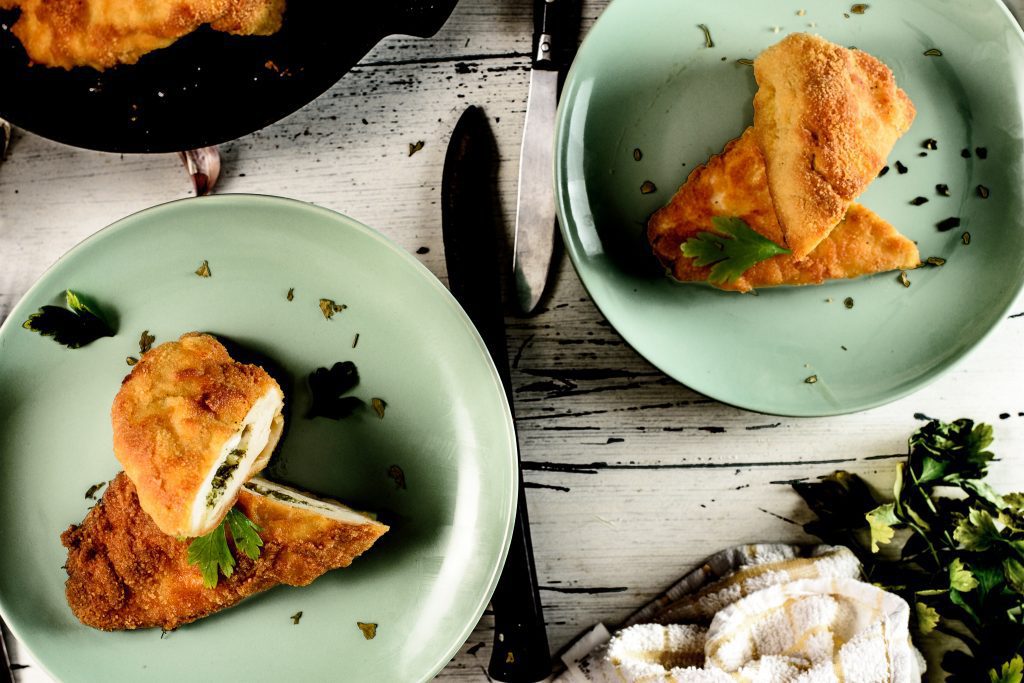
Ingredients
- 1 stick / 120g Butter (room temperature/soft)
- 4 cloves / 12g Garlic (crushed or finely cut)
- 5 tablespoons / 20g Fresh parsley (finely cut)
- 1 teaspoon / 5g Salt
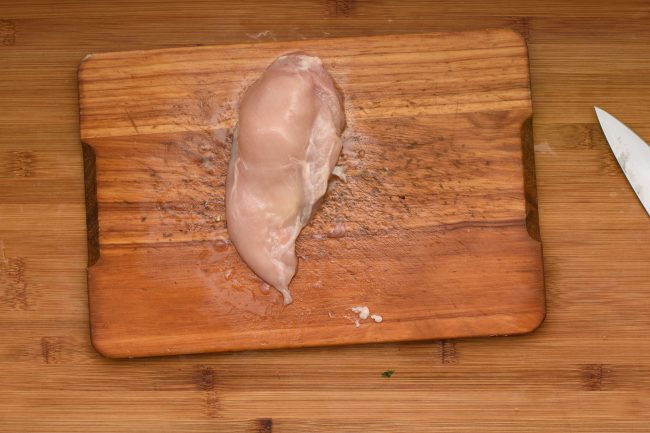
- 6 pieces / 1000g Chicken breast
- ½ cup / 60g Plain flour
- 1 cup / 150g Breadcrumbs
- 3 medium / 150g Eggs
- 1 teaspoon / 5g Salt
- ½ teaspoon / 1.5g Black pepper
- Oil for frying
Note: Eggs, flour and breadcrumbs are approximate values for calorie calculations. We probably need more for easy breading or if we decide to double bread the breasts.
How to make Chicken Kiev
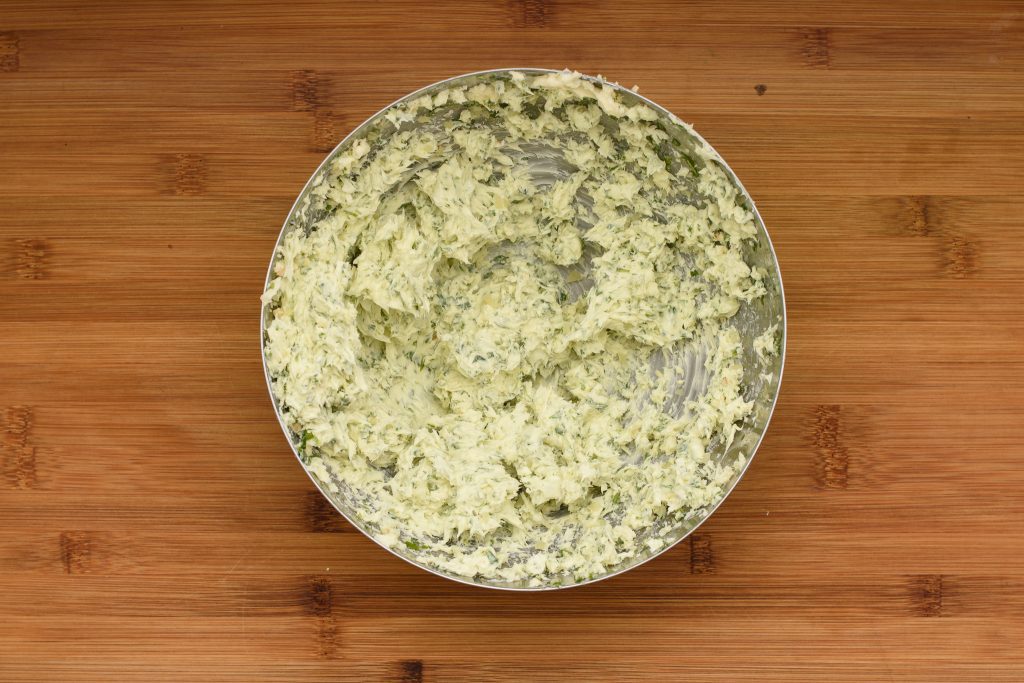
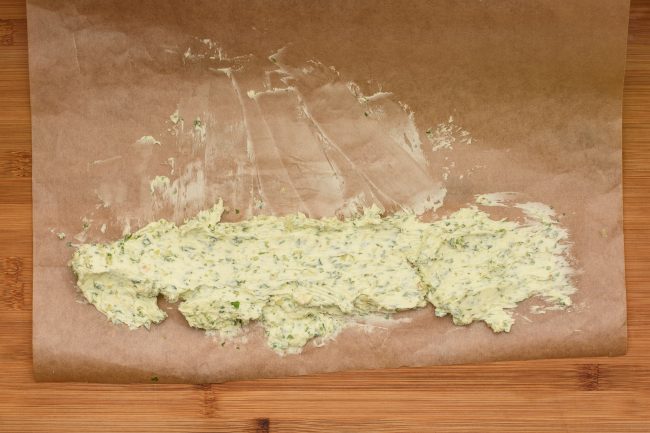
- Mix butter, finely cut garlic, parsley and salt. An electric mixer with a sturdy whisk attachment comes handy here.

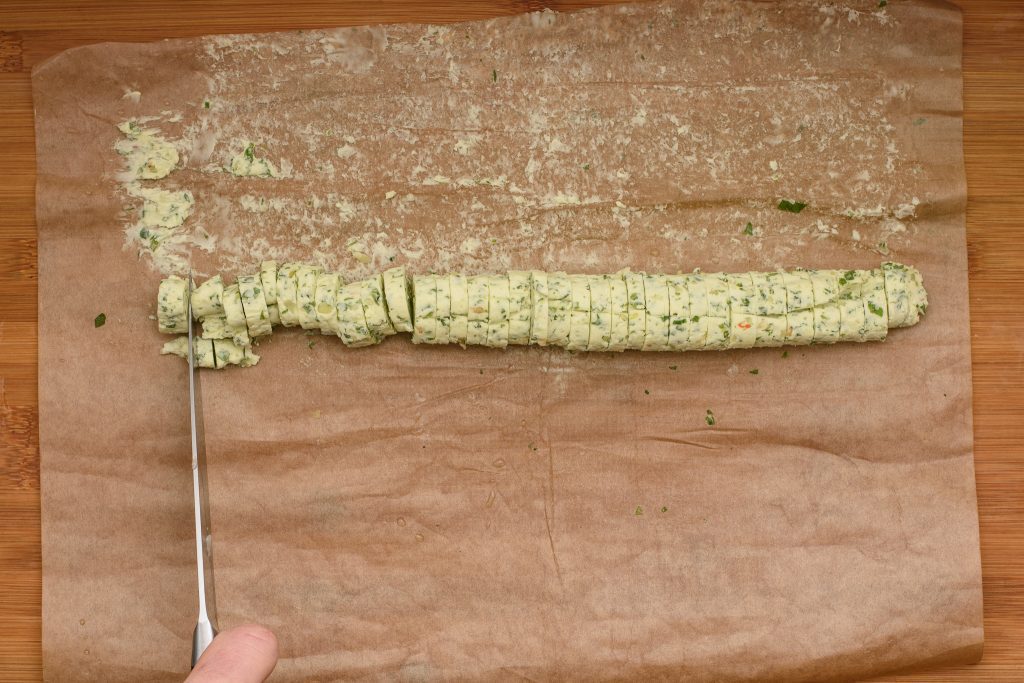
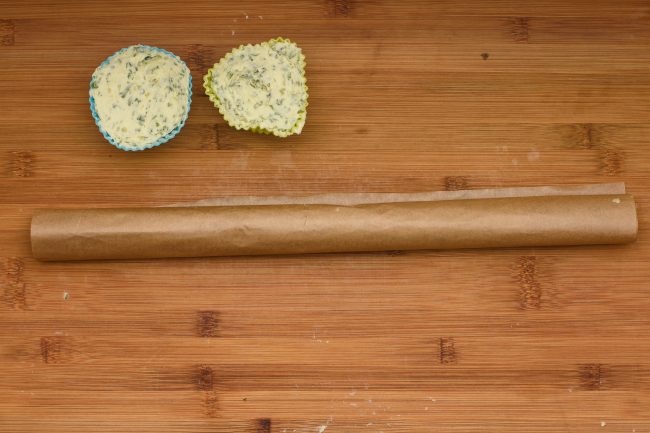
- Place the butter onto a parchment paper and spread it along its edge.
- Roll it up into 1″ / 2.5cm log. It’s an optional step to make portioning easier but we can use any container to keep it. Put the compound butter log into the fridge to set.
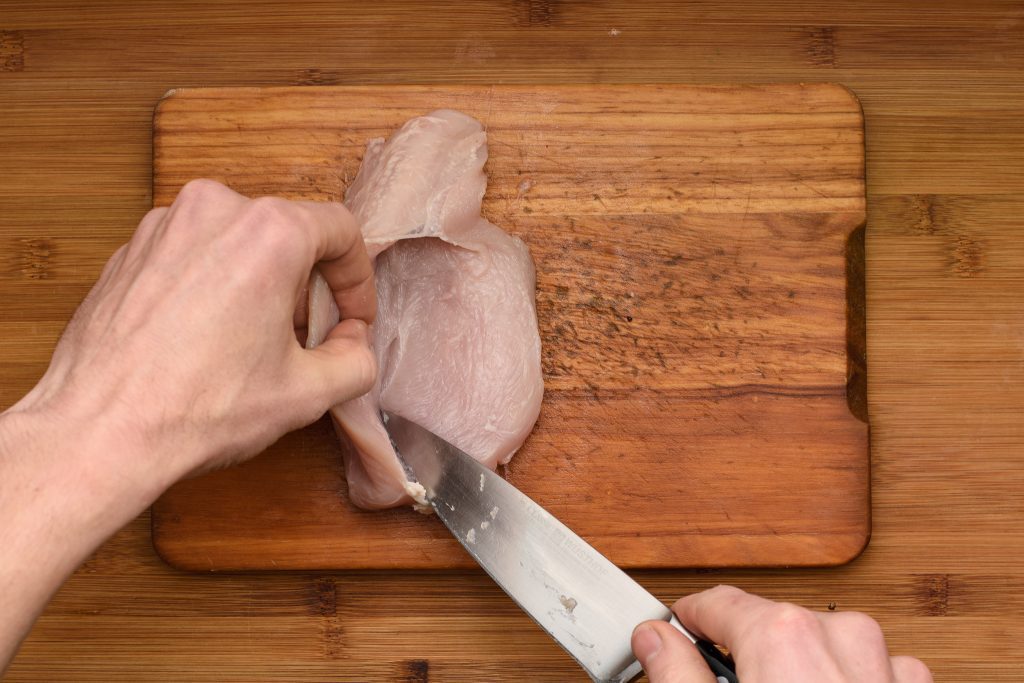
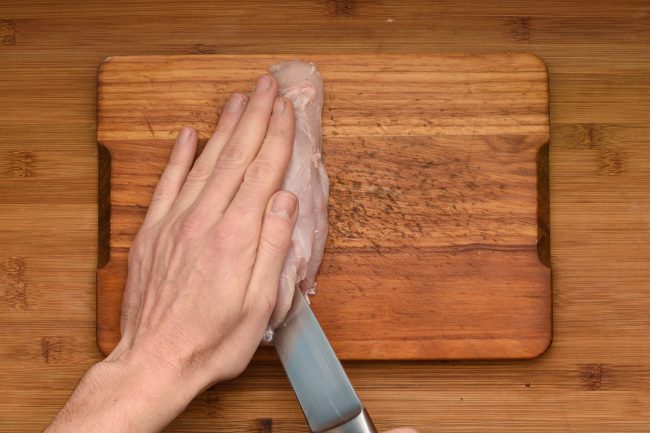
- Hold the chicken breast firmly on a cutting board and make a deep incision along the side where it is the thickest.
- Try not to cut it all the way through. We need to make a pocket for the butter. The size of the pocket will also depend on the size of the chicken breast itself. Once the breast is cut open, we can pound both side a bit to make it bigger if necessary.
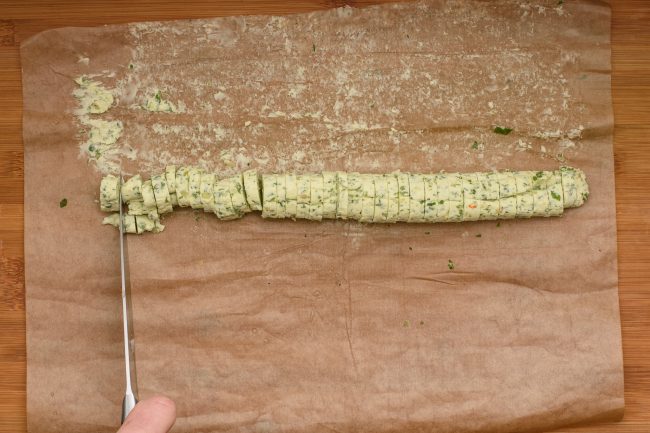
- Take the butter out of the fridge and if it was made into a log, slice it up into equal frac14;” / 0.5cm discs.
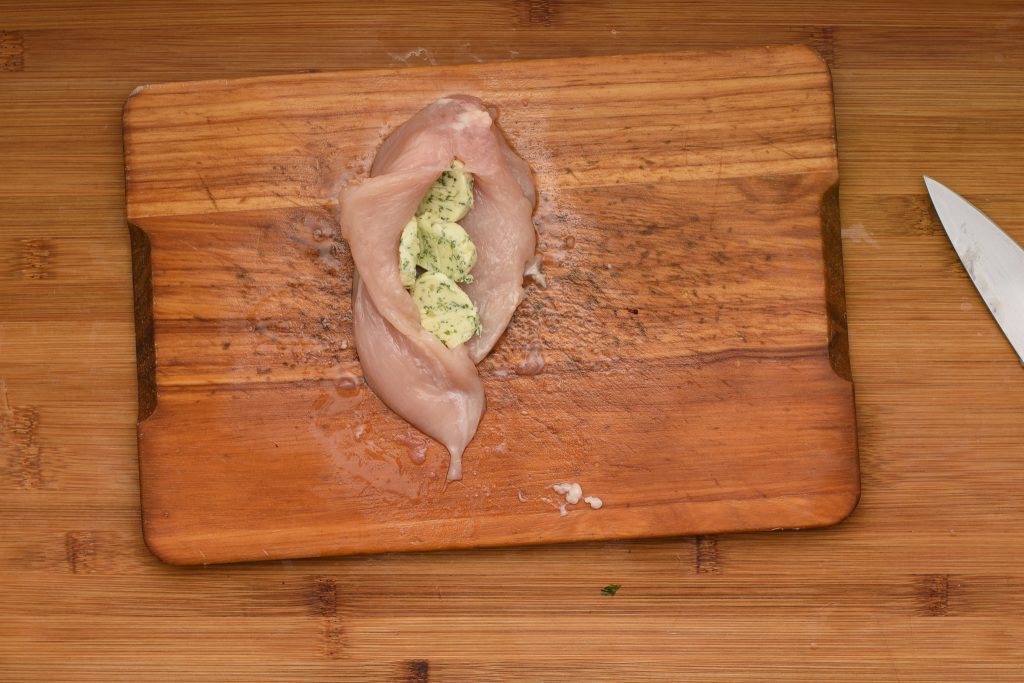
- Put as many discs into each chicken breasts as possible.
- Close up the chicken breasts.
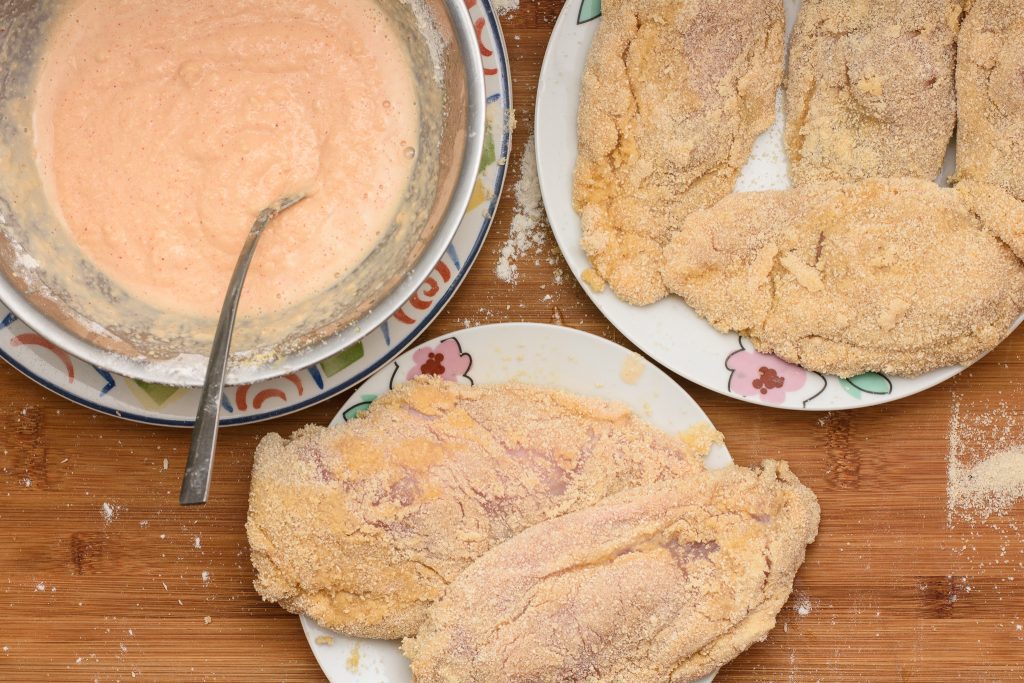
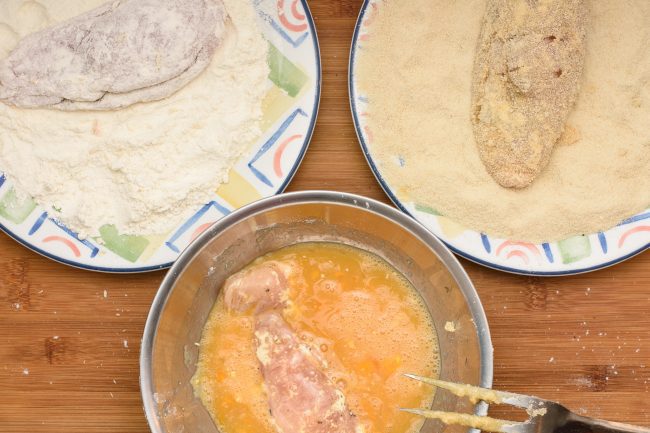
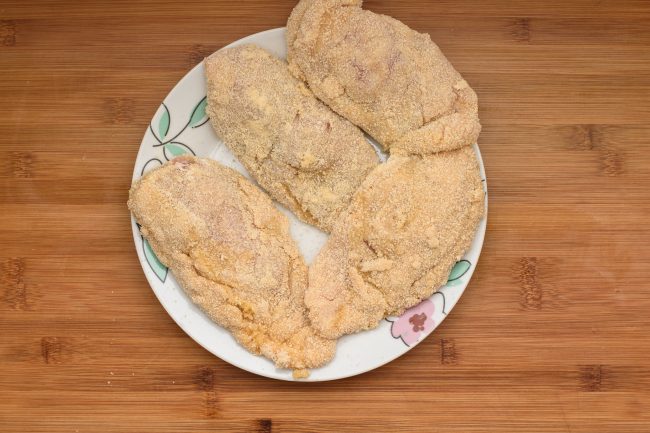
- Set up the breading station by spreading out flour and breadcrumbs on a large flat plate and beat eggs and mix salt and black pepper with it in a bowl. Start by flouring one chicken breast on all sides. Dip the floured chicken breast into the beaten eggs and finally roll it in the breadcrumbs.
- When one is finished, carry on with the rest of them one by one. If unsure of how secure the breasts will held up during frying, dip the cut part of the breast into the eggs then into breadcrumbs again. Try not to place them onto each other as they can tear the breading off from each other.
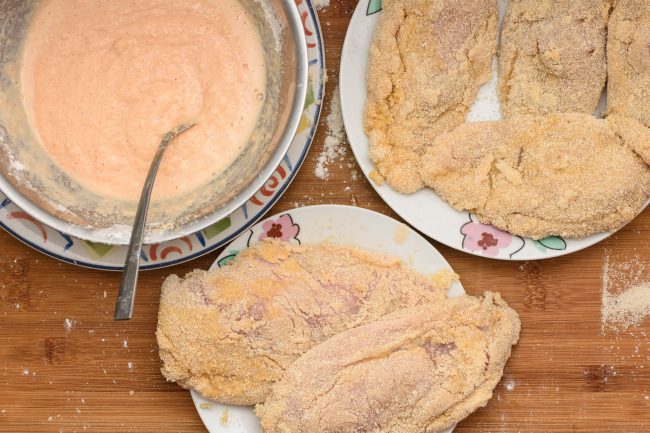
- Mix the leftover flour, breadcrumbs and eggs with some water and spices, such as salt and paprika.
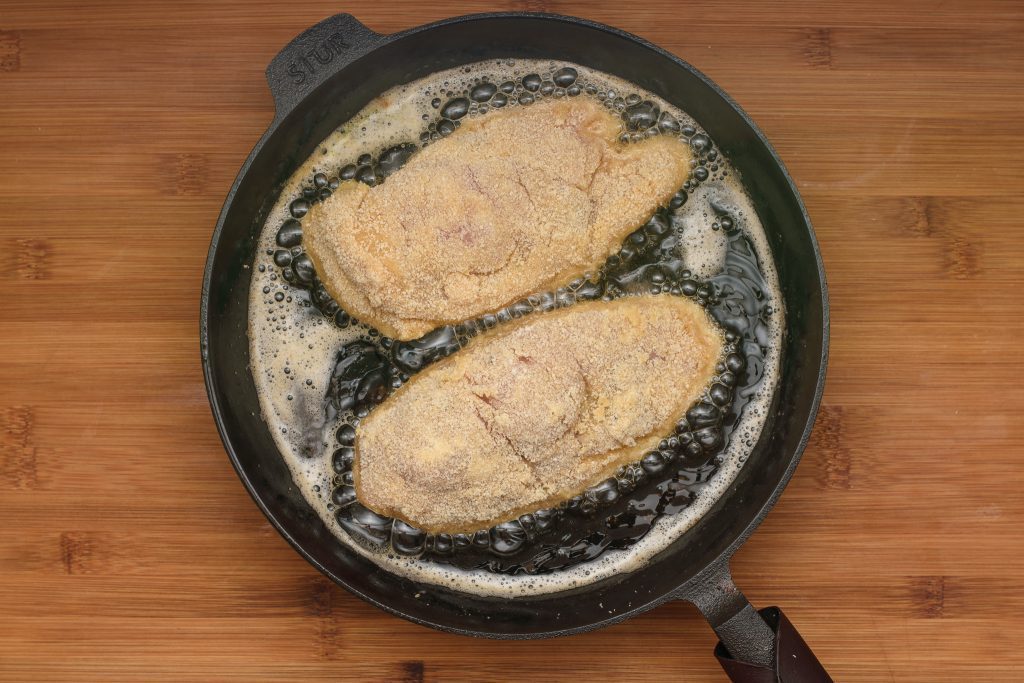
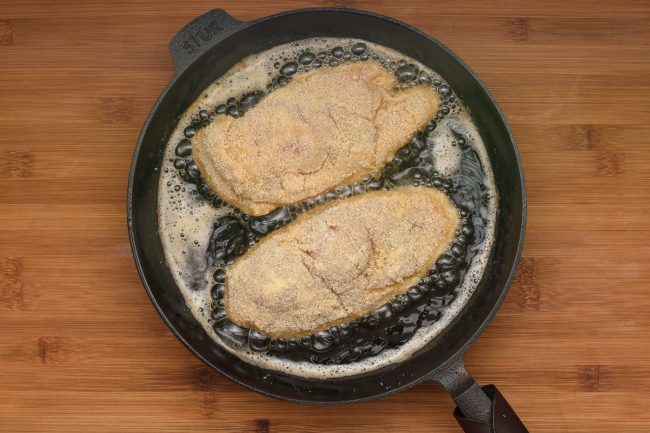
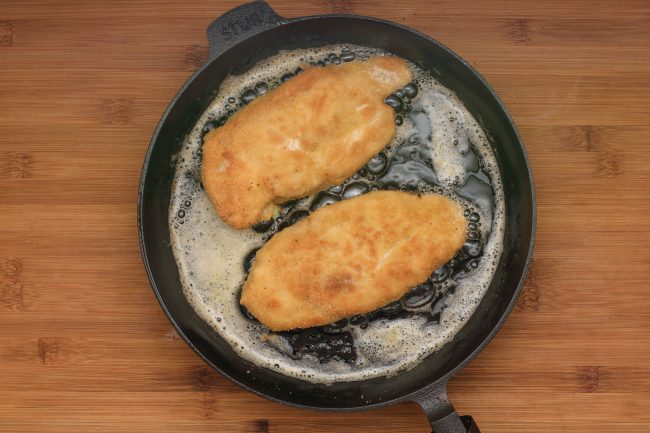
- Heat ⅞” / 2cm oil in a skillet to medium high and place as many breasts in without overlapping.
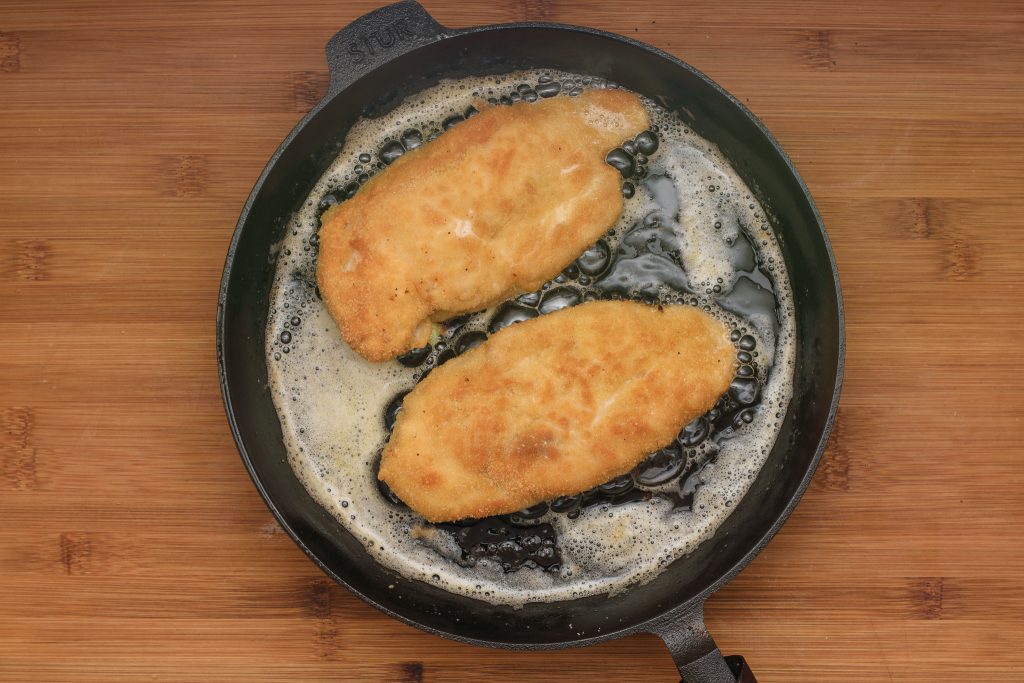
- Fry until the bottom turns golden brown, for about 3 minutes. Flip until the other side gets golden brown too, for about another 4 minutes.
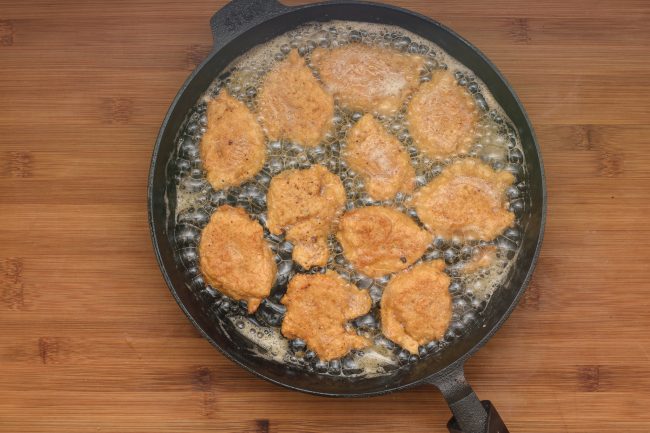
- Don’t forget about the leftover breading. Spoon it into the hot oil and fry until golden brown on both sides, for about 3 minutes. Dip the spoon into water before each dollop for easy handling.
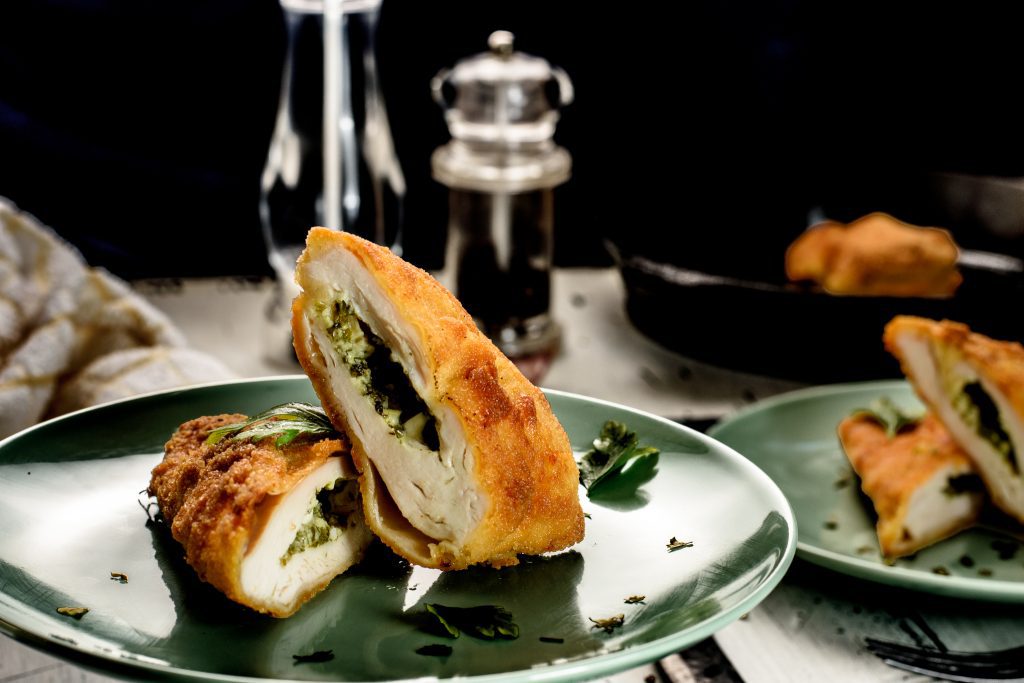
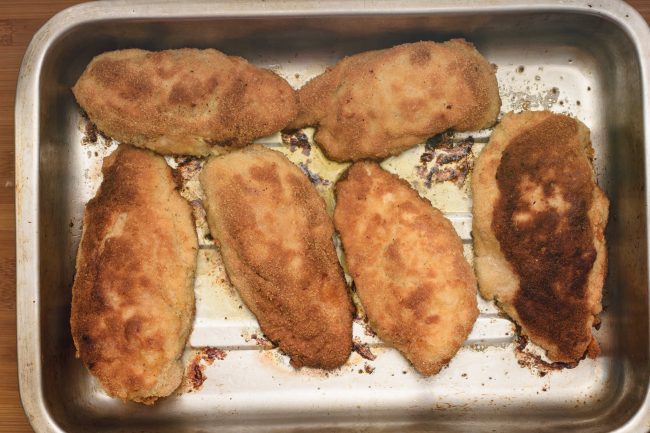
- Place the fried chicken breasts into a preheated 360°F / 180°C oven until cooked through, for about 10 minutes.


Enjoy!
Chicken Kiev Recipe
Ingredients
- 1 stick /Butter room temperature/soft
- 4 cloves Garlic crushed or finely cut
- 5 tablespoons Fresh parsley finely cut
- 1 teaspoon Salt
- 6 pieces Chicken breast
- ½ cup Plain flour
- 1 cup Breadcrumbs
- 3 medium Eggs
- 1 teaspoon Salt
- ½ teaspoon Black pepper
- Oil for frying
Instructions
- Mix butter, finely cut garlic, parsley and salt. An electric mixer with a sturdy whisk attachment comes handy here.

- Place the butter onto a parchment paper and spread it along its edge.
- Roll it up into 1" / 2.5cm log. It's an optional step to make portioning easier but we can use any container to keep it. Put the compound butter log into the fridge to set.
- Hold the chicken breast firmly on a cutting board and make a deep incision along the side where it is the thickest.
- Try not to cut it all the way through. We need to make a pocket for the butter. The size of the pocket will also depend on the size of the chicken breast itself. Once the breast is cut open, we can pound both side a bit to make it bigger if necessary.
- Take the butter out of the fridge and if it was made into a log, slice it up into equal frac14;" / 0.5cm discs.
- Put as many discs into each chicken breasts as possible.
- Close up the chicken breasts.
- Set up the breading station by spreading out flour and breadcrumbs on a large flat plate and beat eggs and mix salt and black pepper with it in a bowl. Start by flouring one chicken breast on all sides. Dip the floured chicken breast into the beaten eggs and finally roll it in the breadcrumbs.
- When one is finished, carry on with the rest of them one by one. If unsure of how secure the breasts will held up during frying, dip the cut part of the breast into the eggs then into breadcrumbs again. Try not to place them onto each other as they can tear the breading off from each other.
- Mix the leftover flour, breadcrumbs and eggs with some water and spices, such as salt and paprika.
- Heat ⅞" / 2cm oil in a skillet to medium high and place as many breasts in without overlapping.
- Fry until the bottom turns golden brown, for about 3 minutes. Flip until the other side gets golden brown too, for about another 4 minutes.
- Don't forget about the leftover breading. Spoon it into the hot oil and fry until golden brown on both sides, for about 3 minutes. Dip the spoon into water before each dollop for easy handling.
- Place the fried chicken breasts into a preheated 360°F / 180°C oven until cooked through, for about 10 minutes.


Notes
Pin now, Enjoy later!